Continuity Test: Step-by-Step With a Multimeter (2026)
TL;DR
A continuity test checks whether an electrical path is complete between two points, confirming that current can flow through a wire, fuse, switch, or other component. You perform it with a multimeter set to continuity mode on a de-energized circuit. A beep and near-zero ohm reading means the path is good; “OL” (open loop) and silence means it’s broken. This is one of the first diagnostic skills every appliance repair and HVAC/R technician must learn.
What Is a Continuity Test?
A continuity test is a quick diagnostic check that tells you whether electricity can travel from one point to another through a conductor or component. In electrical terms, “continuity” simply means a complete path for current flow exists.
Here’s how it works mechanically. Your multimeter sends a small voltage (typically between 1.5V and 9V from its internal battery) through the circuit path you’re testing. If the path is unbroken, current flows, the meter detects low resistance, and it beeps. If there’s a break anywhere along that path, no current flows, and the meter displays “OL” (meaning open loop, or infinite resistance).
Think of it like checking whether a garden hose has a kink. You’re not measuring how much water pressure you have. You just want to know: is water getting through, or isn’t it?
What the results mean:
| Reading | What It Means | Action |
|---|---|---|
| Beep + 0 to 2 Ω | Good continuity, complete path | Component is likely functional |
| Beep + 10 to 100+ Ω | Continuity present but high resistance | Inspect for corrosion, loose connection, or degraded component |
| OL (no beep) | No continuity, open circuit | Component is broken, wire is severed, or fuse is blown |
One thing worth noting: the beep threshold varies by meter. On a Fluke multimeter set to the 400 Ω range, for example, the beep triggers when resistance is below about 40 Ω. Cheaper meters may have different thresholds. This is why looking at the actual resistance number matters, not just listening for the beep.
Why Continuity Testing Matters for Technicians
Appliance Repair
When an appliance fails electrically, the broken part rarely looks broken. A thermal fuse, a door switch, a heating element, a disc thermostat: these components can stop working while appearing perfectly normal with no visible damage or corrosion. A continuity test is how you find the culprit without guessing.
Common appliance components tested for continuity include thermal fuses, lid and door switches, timer contacts, relay coils, heating elements, and wiring conductors. In each case, you’re asking the same question: is this part still allowing electricity through, or has it failed open?
If you’re considering a career in this field, our appliance repair technician career guide covers the full scope of skills you’ll need, with continuity testing right at the foundation.
There’s also a critical safety application. After testing a wire for continuity, you should also check for continuity between that wire and the metal frame of the appliance. If you find continuity there, it means a bare or damaged wire is touching the cabinet, creating a potentially lethal ground fault. Never plug the appliance back in until that wire is repaired.
HVAC/R
Electrical components in HVAC systems take a beating from frequent cycling, temperature extremes, and moisture exposure. Contactors, relays, disconnect switches, and compressor windings are all candidates for continuity testing during routine maintenance and service calls.
One HVAC practitioner shared a telling story on LinkedIn: a rooftop unit kept blowing two of three fuses every time power was cycled. After checking all the obvious loads and finding nothing wrong, the technician tested the disconnect switch itself and found inconsistent continuity across the three legs. Replacing the disconnect solved the problem entirely. It was a component many technicians would have overlooked.
For compressor diagnostics, continuity testing between terminals can identify open windings, while testing between terminals and the compressor casing checks for shorted windings to ground. Any continuity to the casing means the compressor is shorted and needs replacement.
If HVAC/R work interests you, our HVAC/R technician career guide outlines what the job looks like day to day.
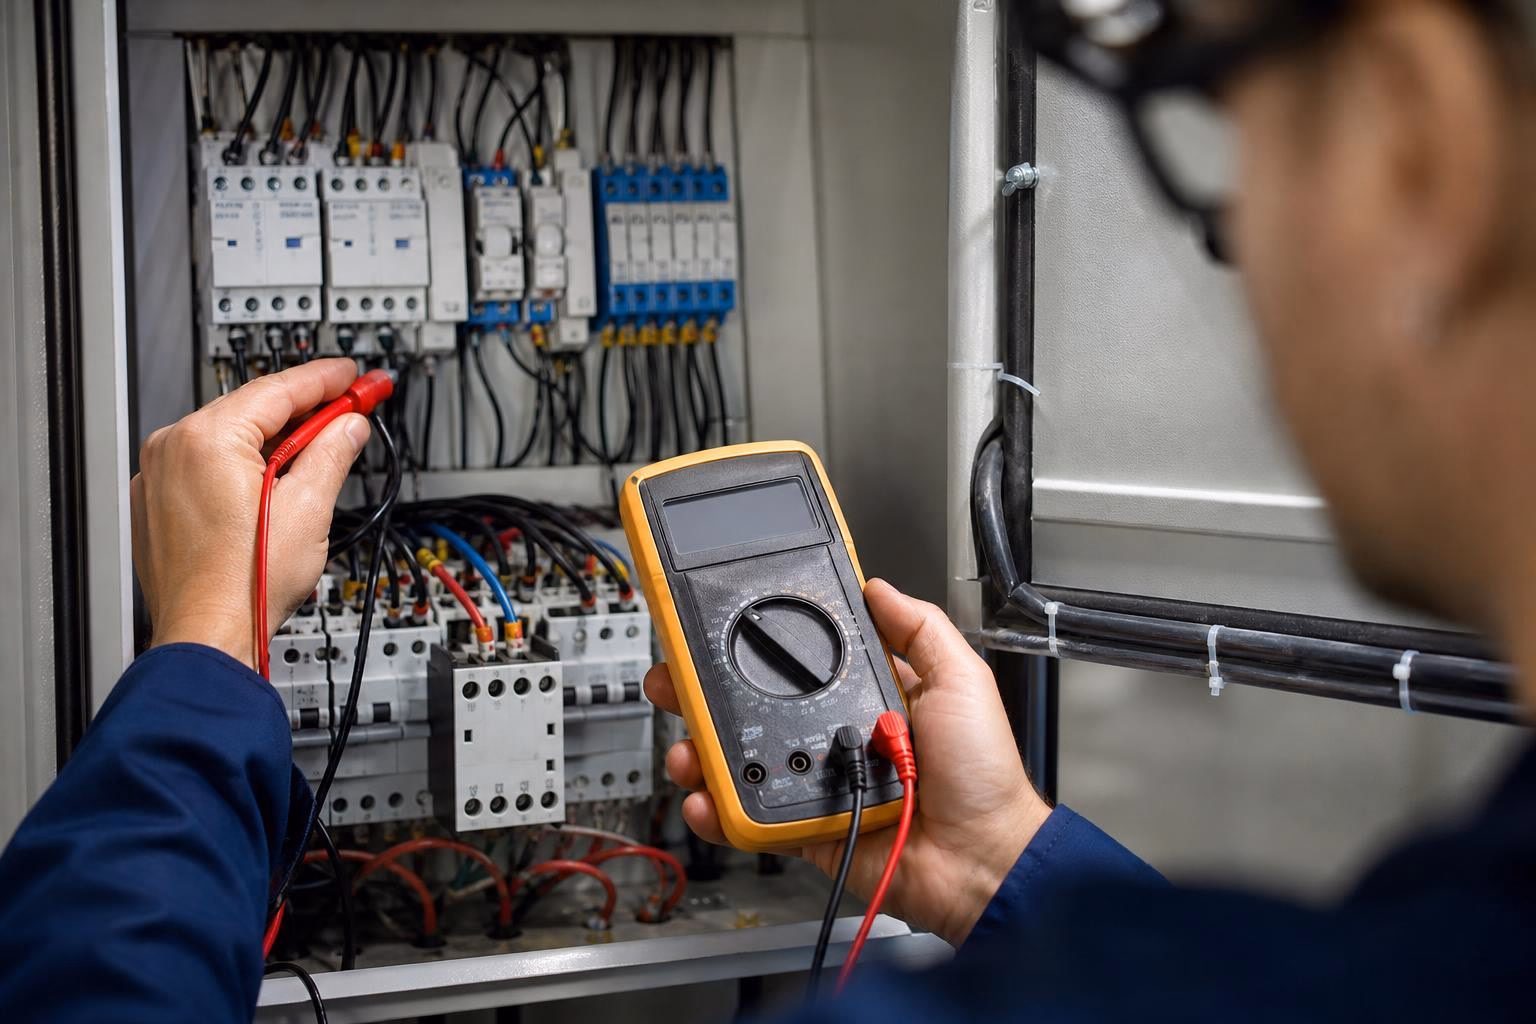
How to Perform a Continuity Test
What you need: A digital multimeter (DMM) with a continuity mode. Most multimeters have this, marked with a symbol that looks like a small speaker emitting sound waves (beginners often describe it as a “sideways Wi-Fi symbol”). You can also use a dedicated continuity tester (a simple battery-powered device with a light or buzzer), though it won’t give you a resistance reading.
Step-by-Step Procedure
1. De-energize the circuit. Unplug the appliance or shut off the breaker. A continuity test is always performed on a de-energized circuit. This is non-negotiable.
2. Isolate the component. Disconnect at least one wire lead from the part you’re testing. If the component stays connected to the rest of the circuit, parallel paths can give you a false continuity reading, making a bad part look good.
3. Set the multimeter to continuity mode. Turn the dial to the continuity symbol. If your meter doesn’t have a dedicated continuity mode, use the lowest resistance (Ω) setting instead.
4. Plug in your probes. Black probe to the COM port, red probe to the VΩ port.
5. Verify the meter works. Touch the two probe tips together. You should hear a continuous beep and see a reading below 1 Ω on the display. This confirms your meter, leads, and battery are all functioning.
6. Test the component. Place one probe on each terminal or endpoint of the part you’re testing.
7. Read the result. Beep plus near-zero ohms means continuity. Silence plus OL means no continuity (open circuit). Refer to the table above for more nuanced readings.
Students in Stoneforge Academy’s virtual labs practice this exact procedure in simulated environments before working on real equipment, building the muscle memory and confidence that matters on the job.
Common Mistakes to Avoid
Testing a live circuit. This is the number one mistake, and potentially the most dangerous. Probing a device that’s still powered on can fry your multimeter, destroy components, and put you at risk of electric shock. Always verify power is off.
Not isolating the component. Practitioners on repair forums frequently report misleading readings because they tested a component while it was still wired into the circuit. Parallel paths through other components create shortcuts that fool the meter into showing continuity where the tested part is actually open.
Relying only on the beep. Some technicians hear a beep and move on without looking at the resistance value. A beep at 0.5 Ω is very different from a beep at 45 Ω. The number tells you more than the sound does.
Dirty or damaged probes. Corroded probe tips or a weak battery can cause intermittent or inaccurate readings. Before each testing session, inspect your probes and test them against each other.
Testing on a PCB without desoldering. Forum users on All About Circuits warn that continuity mode may use more current than resistance mode on some meters, which can damage sensitive electronics. When testing components on a circuit board, desolder at least one leg to isolate the part and avoid both false readings and potential damage.
Continuity Test vs. Resistance Test
This is the single biggest confusion point for beginners. Practitioners on DIYChatRoom, Quora, and LinkedIn all ask variations of the same question: “Aren’t continuity and resistance testing the same thing?”
They’re related, but they serve different purposes.
| Continuity Test | Resistance Test | |
|---|---|---|
| Purpose | Pass/fail: is the path complete? | Quantitative: how much opposition to current flow? |
| Output | Beep or no beep (plus approximate Ω) | Precise Ω value |
| Best for | Blown fuses, broken wires, stuck switches | Verifying heating elements are within spec, checking motor winding resistance |
| Speed | Very fast | Slightly slower (need to compare against specs) |
As one DIYChatRoom user put it plainly: “A continuity tester is just a low-accuracy resistance meter with no numerical readout, and a good/bad indicator instead.”
Here’s the important nuance that most guides skip: continuity alone does not confirm a part is good. A heating element can show continuity (the wire isn’t broken) but have resistance far outside its rated specification, meaning it won’t heat properly. A compressor winding can show continuity between terminals but be shorted to ground. In both cases, you need actual resistance values to catch the problem.
When you graduate from “is this path complete?” to “is this component performing within spec?”, you’ve graduated from continuity testing to resistance testing. Both skills matter.
What About Insulation Resistance Testing?
This is a more advanced distinction, but worth knowing. A continuity test checks that conductors carry current properly. An insulation resistance test checks the opposite: that insulation between conductors is sound and not leaking current where it shouldn’t. Insulation testing requires a megohmmeter (often called a “Megger”) and is common in HVAC and industrial electrical work.
Build This Skill Through Structured Training
Continuity testing is one of the first hands-on skills taught in any electrical trade program because nearly every diagnostic workflow starts here. Whether you’re troubleshooting a dead dryer, a tripped HVAC contactor, or a faulty extension cord, the continuity test is step one.
Stoneforge Academy’s Appliance Repair Technician and HVAC/R Technician programs teach continuity testing and resistance measurement as core competencies, with practice built into virtual and VR lab sessions. If you want to see how simulation-based learning works for hands-on procedures like this, read about what to expect in our VR labs.
Ready to start building real diagnostic skills? Schedule a call with admissions to learn which program fits your goals.
Frequently Asked Questions
Can I perform a continuity test on a live circuit?
No. A continuity test must always be performed on a de-energized circuit. Testing a live circuit can damage your multimeter, destroy the component being tested, and create a serious shock hazard.
What does “OL” mean on my multimeter during a continuity test?
OL stands for “open loop” or “overload,” meaning infinite resistance. In continuity testing, it means there is no complete path between the two points you’re probing. The circuit is open, the wire is broken, or the component has failed.
Is a continuity test the same as a resistance test?
Not exactly. A continuity test is a quick pass/fail check that tells you whether a path exists. A resistance test gives you a precise numerical value in ohms. You need resistance testing when you want to verify a component is within its rated specification, not just that it isn’t completely broken.
Why does my multimeter show continuity when the part is still bad?
Two common reasons. First, if you didn’t isolate the component, parallel paths through other parts of the circuit can create a false positive. Second, continuity only confirms the path isn’t completely open. A part can show continuity but have resistance far outside its normal range, meaning it’s degraded but not fully broken. Measure actual resistance and compare it to the manufacturer’s specification.
What is the continuity symbol on a multimeter?
It looks like a small speaker with sound waves coming out of it, or sometimes like a musical note. On some meters, it shares a position with the diode test symbol. Check your multimeter’s manual if you’re unsure.
Do I need to remove a component from the circuit board to test it?
For accurate results, yes. When a component is still soldered in place, your meter tests everything connected to it in parallel. This can produce false positives. Desoldering at least one leg of the component isolates it for a reliable reading.
Can a continuity test damage sensitive electronics?
It’s possible. Some multimeters push more current in continuity mode than in resistance mode. Practitioners on electronics forums report that probing sensitive ICs or microcontrollers with continuity mode can potentially cause damage, depending on the meter model. When working on sensitive PCBs, use resistance mode at a known-safe range instead.
What tools besides a multimeter can perform a continuity test?
Dedicated continuity testers (simple devices with a battery, test lead, and light or buzzer) are inexpensive and easy to use, but they don’t provide a resistance reading. Analog multimeters can also check continuity using the ohms setting, where the needle deflects toward zero if continuity exists. For professional trade work, a digital multimeter with a dedicated continuity mode is the standard.
